While the Forsaken Fortress could be considered a dungeon in The Legend of Zelda: The Wind Waker, it doesn’t really count as the first dungeon. The first dungeon of this game is shortly after you arrive on Dragoon Roost Island. There is a big dragon at the top of the island, and something is causing him a great deal of distress. This eventually leads you to Dragon Roost Cavern as you investigate the cause of the island’s troubles.

Related
Tips & Tricks For Zelda: The Wind Waker
These best tips for The Wind Waker will teach you what to do first and what to prioritize in this classic Zelda entry for GameCube.
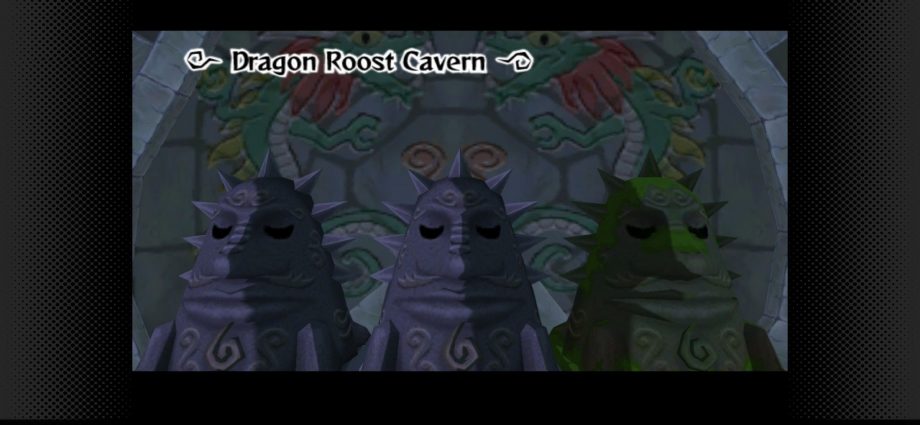
Dragon Roost Cavern Walkthrough

At the start of the dungeon, you will be in a room that seems like a dead end. Approach the statue on the left and pull it back until it stops moving. Next, grab the middle statue from the left side and pull it over twice. This reveals a doorway that will lead you into the next chamber.

Ahead, you will find a locked door and two bokoblins guarding it. Pick up the torch one of the bokoblins drops after killing them, and approach the unlit braziers on the left side of the room. If the flame extinguishes before you can light the braziers, there is a nearby brazier that you can use to reignite your torch. Once both braziers are lit, a chest will appear that contains a small key. Use the key to unlock the door in front of you.
The next chamber beyond this point is a wide, open space with multiple doors. There is only one path forward at the moment, so don’t worry about getting lost. Go left along the walkway and jump down to the platform ahead of you. Pull out the box and then jump to the other side of the walkway. Follow the path and go across the bridge to the other side of this chamber. You can either ignore the bats or kill them.

Either way, pick up the bomb flower and throw it at the large cracked rock to reveal a door. This leads to a room with a large pool of lava that is too big to jump across. Pick up one of the vases on the left or right and throw it into the lava. This creates a rock platform that you can use to get across. Before going up the ladder ahead, loot the chest on the left to claim the Dungeon Map. There is a red chuchu waiting to ambush you at the top of the ladder, so be mindful of that.
Be mindful of where you are throwing the vases of water. If the stone platform is too far away, you won’t be able to make the jump. Since there are a bunch of water vases in this room, try using more than one to give yourself more space to work with when jumping across.

As you enter the next room, approach the barricade directly in front of you. A bokoblin will emerge and destroy the barricade. Kill him and take his large sword. You can either swing the sword or throw it to destroy the remaining barricade. Deal with the two red chuchus that spawn and destroy the last barricade to find another small key.

Return to the large lava chamber from earlier and use the small key to open the locked door you saw earlier. Beyond the locked door there are two paths. The one on the right can’t be accessed until you have the Grappling Hook. Follow the path on the left and kill all the red chuchus and the bokoblin hiding in a pot on the left. Pick up the bokoblin’s weapon and light it with the nearby brazier. This will allow you to burn down the barricade that would otherwise be unbreakable.
Step on the switch on the other side of the barricade to open the door to the next part of the dungeon. Cross the bridge and kill the bokoblin. Be careful when fighting the bokoblin, as you can accidentally cut the ropes holding the bridge up. While going up the ladder, pay attention to the fiery holes in the rock wall along with the burn marks on the ladder. Every couple of seconds, fire will spew out of these holes. You don’t want to be hit by these, so carefully time when you are going up the ladder and stop when the flames start spewing out.
Kill the Kargarok at the top of the ladder and then carefully sidle across to the other side. Just like with the ladder, you will want to time it to avoid getting hit by the pillar of fire. On the other side, hold onto the ledge of the wooden platform and go left. Climb up the ledges on the other side to find a bomb flower. Pick it up and throw it at the cracked rock to reveal a door that will lead you further into the dungeon.

Within the next chamber, you will have to pull blocks to form stairs to reach the door. In the chamber ahead, watch out for the rats. While they don’t do much damage, they will steal your Rupees. Pull out the block from the wall and then use it to climb up to the ledge above.
Loot the chest next to the brazier and grab one of the sticks nearby. Set the stick on fire and throw it at the barricade on the other side of the room. Climb up the ladder and claim the small key from the chest. Use the small key on the locked door, and you will find yourself outside the dungeon again. Go up the stairs to find a locked door. Fortunately, the small key you need is right under the Kargarok to your left.

Related
What To Do With Golden Feather In Zelda: The Wind Waker
In Zelda: The Wind Waker, Golden Feathers drop from many flying enemies and are used in one of the game’s many gifting quests.
How to Get the Grappling Hook

There is no light in the room ahead, but there are plenty of sticks you can use as a torch. You will also need them to light braziers and destroy a barrier as well, so make sure to keep it lit. There are also four bats on the ceiling that will be lured in by the flames. In order to gain access to the next room, light all the braziers.
Before going across the bridge, use a bomb flower to destroy the rock on top of the pot. This pot acts as a warp point. So if you save and quit here, you can jump into the pot at the entrance of this dungeon to get back to this spot quickly. When you are ready, go across the bridge and go through the door.
The door locks the moment you enter this room. Kill the one bokoblin guarding this room and then roll into the wall near the locked door. This will cause a pot to drop to the ground, revealing another bokoblin with a staff hiding inside it. After dealing with the bokoblin, use his stick to light the unlit brazier. Grab the Treasure Chart from the chest and then destroy all the pots on the left side of the room to find the last bokoblin. With the doors unlocked again, climb up the ladder.
You will need to be careful when fighting the Magtail in this room. While they are easily beaten by parrying, there isn’t a lot of space, and you can easily roll into the lava mid-animation. Create a platform with the water vase so that you have more space to fight the Magtail. Once the Magtail is dead, jump over to the platform it was on while carrying another vase of water. There is a pillar of lava that you can turn into an improvised elevator. To do this, wait till you see the lava bubbling and then throw the vase of water at that spot. Quickly jump onto the stone platform and the lava will shoot it up. Just make sure to get off before it goes back down.

Beyond this point, you will see the door to the boss chamber, but you can’t reach it yet. Instead, use the bomb flower to destroy the two rocks nearby. This reveals a door and another warp pot. Go through the door to trigger a brief cutscene. Head up the stairs, but move quickly as a large portion of them will collapse moments after you step on them.

Medli’s attempt to reach Valoo appears to have gone poorly. Kill the bokoblins and then be ready to deal with the moblin that shows up immediately after. Once all enemies are dead, Medli is free. Talk to her to receive the Grappling Hook.

Head up the stairs to get a quick tutorial on using the Grappling Hook. This mechanic is important later, so make sure to master it now. Use the Grappling Hook to reach a barrier and destroy it. This leads you back to a door, but turn around and use the Grappling Hook to go left toward a new area you haven’t been to yet.
How to Get the Boss Key

The next chamber may seem like just a dead end with two bokoblins, but there is a way forward. It may seem counterintuitive, but this time you will want to destroy the bridge. Just make sure to do it after killing the bokoblins and not before. Killing them spawns a chest below that contains a Joy Pendant.

Go through the door and jump into the cage with the platform supported by only three ropes. Use a spin attack to take out all three ropes at once. When there is no lava hitting the platform, it will fall and take you to a new area. Jump across the platforms and climb up the ladder. You will find yourself in that large lava chamber that you encountered at the start of the dungeon, but this time you are on the other side of it.
Use the Grappling Hook on the hanging lever above you to open the door in the mouth of the skull. To get down from the lever, tilt the stick to build up momentum and then let go while you are still above the platform to jump backward rather than forward.
In the next chamber, you can use the Grappling Hook to reach a dead-end alcove. But instead of doing that, grapple onto the hook and stop swinging. While holding ZR (or R on a GameCube controller), turn to the right and jump to that area. Use the platforms to get to another chamber.

There is a large chest in this room that contains the Boss Key. But to get it, you will need to get rid of the fire surrounding it. There is a switch you can step on that will deactivate the flames, but the flames reignite the moment you step off of it. To get around this, look for a magtail that will spawn from the pool of lava. Do not use a parry attack, as this will instantly kill it. Instead, use a thrust attack twice on the magtail. Doing so causes the magtail to curl up into a ball for a short time. Pick up the magtail and drop it on the switch to solve your fire problem.
From here, head back to the room with the bridge that you destroyed earlier. Take out the firebats and then carry a pot of water over to the side with the treasure chest. There is a lava pillar that shoots up periodically, and you can use the water pot here to create an express elevator back up. From here, retrace your steps back to the room with the boss door. You can use the Grappling Hook to get to the other side. Make sure to loot the chest on the right and the left before fighting the boss, as one of them contains a Knight Crest.
The small pot on the left contains a fairy. Try to catch one in your empty bottle. If you have a fairy in a bottle and your health reaches 0, you will automatically be brought back up to full health.
How to Beat Gohma

The key to beating Gohma is your Grappling Hook. But the most important thing to remember here is timing. If you try to use the Grappling Hook on Valoo’s tail too quickly, Gohma will knock it away. If you do it too late, you will get hit by Gohma. Ideally, the best time to use the Grappling Hook is when Gohma’s claw is stuck in the ground, but sometimes Gohma will refuse to use this ability for no reason.

Once you manage to successfully use the Grappling Hook on Valoo’s tail, jump across. This causes the rock attached to Valoo’s tail to drop on Gohma, damaging its armor. After a few seconds, Gohma will emerge again from the lava and put the rock back into place. Gohma causes fire to shoot out and fall when it emerges, so watch out for that. Gohma will take a few seconds to reorient itself before attacking, so use this opportunity to latch onto Valoo’s tail again.

When Gohma has been hit by the rock three times, phase two begins. Gohma is no longer protected by armor, but moves faster. You can either wait for Gohma to lower down so that you can hit its eye, or you can target Gohma and use the Grappling Hook. Either way will stun Gohma, giving you time to attack it with your sword. Once you’ve done enough damage, Gohma will die. Claim the Heart Container and then step into the wind to leave this dungeon.