Since its release in 2014, The Sims 4 has been a hotbed of different mods that are used to add new features, tweak existing ones, or improve the game’s realism. The Sims 4 has numerous exciting features to keep players hooked; a few might still want to experiment with different mods and see what customization they bring to the table.

Related
The Sims 4: How to Edit Sims
Players can change just about everything about a Sim in The Sims 4, and this guide will show them how to do it.
Beginners can find themselves salivating once they discover these mods and their installation process can be a bit daunting for them. This tutorial will guide players on how to add mods to The Sims 4.
Updated by Will Butterworth on April 2, 2025: The Sims 4 partnered with CurseForge, a mod repository that supports tons of other titles like Minecraft, Stardew Valley, and many others. Since the partnership, installing mods on The Sims 4 has become extremely easy, but it does take a few initial steps to set up. We’ve updated this guide to include how to install mods on The Sims 4 with CurseForge.
How To Install Mods on The Sims 4 with CurseForge

Players can download CurseForge to install mods in The Sims 4. To do so, head to the CurseForge website and download the latest version of the app. After it’s finished installing, open the app. Players may receive a prompt to create an account, but it isn’t necessary. However, players will need to connect The Sims 4 to CurseForge.

The great news is that CurseForge can do this on its own. Just click the + sign on the left panel and click the “Scan Computer for Games” option. CurseForge will go through the game library and find games that are compatible with it. Players can also manually add The Sims 4. To do so, click the “Manually Add a Game” option instead of “Scan Computer for Games.”
Players must know the folder route for the specific game they want to add. Just click the game, and CurseForge will start to connect to it. If players don’t know the specific folder route, the “Scan Computer for Games” option will be much simpler.
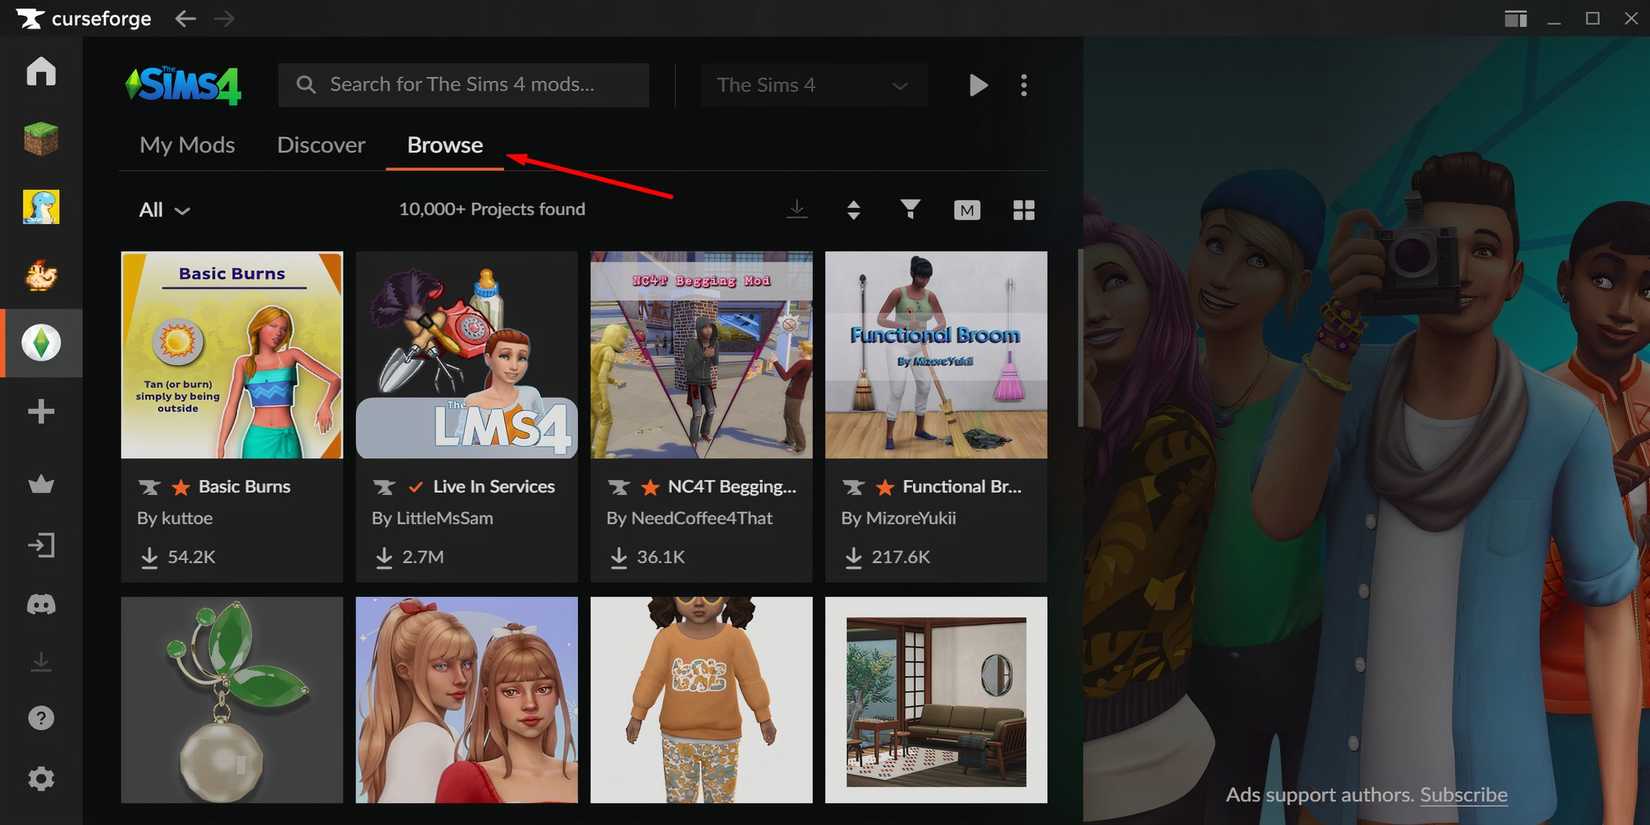
Once CurseForge has The Sims 4 listed on the left side panel, click the icon, and players can see a huge database of mods. From there, players can click the “Browse” option. A large list of mods will appear, which may seem overwhelming initially, but players can easily filter options to find what they want.
For example, if a player wants some new building items, then they can first click the “All” button on the left side and filter by “Build & Buy.” All mods related to building and buying in The Sims 4 will appear.
Some mods may only work with certain versions of the game. Players can click the funnel icon to filter the mods based on the game version. Finally, if players already know the name of the mod they want to use, they can search for it in the search bar at the top of the page.
To add a mod to The Sims 4 in CurseForge, players just need to hover over the thumbnail of the mod they’re interested in, and a button will appear with the option to install it.

Players can click the “My Mods” tab at the top of the menu to see if the mod was successfully installed. This page shows all the mods currently installed in The Sims 4. Aside from installing mods, CurseForge also makes keeping mods up-to-date super easy. When players check CurseForge, they’ll see immediately if a mod needs an update.

Up at the top left, players will see a few icons, one of which is a downward-pointing arrow. Another is the same downward-pointing arrow, but there are two of them grouped together. The single arrow will have a number notification if a mod needs updating. The number that the player sees is the number of mods that need updating.
Players can choose the downward arrow to update a single mod or the double arrow icon to update them all. CurseForge will take care of the updating process from there. Installing mods on The Sims 4 has never been easier, thanks to CurseForge.
How to Install The Sims 4 Mods on Windows

To install mods in The Sims 4, follow these step-by-step instructions.
- Download the required mod from the internet.
- Once downloaded, unzip the zipped file.
- Copy the mod file and paste it to the mod’s directory located at “[Drive Name]:\Users\[User Name]\Documents\Electronic Arts\The Sims 4\Mods.
- Restart the game and enjoy the new content.
How to Install Sims 4 Mods on Mac

Installing mods on Mac is slightly different as compared to Windows. Follow these instructions to add mods in The Sims 4 on Mac.
- Download the desired mod and unzip it.
- Move the unzipped file to “Documents/Electronic Arts/The Sims 4/Mods”.
- Relaunch The Sims 4 and explore the customization options.
In case players don’t find the “Mod” folder, simply create one with the same name.
How To Enable Mods For The Sims 4

For first-time mod installers, enabling mods is necessary to implement changes into the game. Here is how it’s done:
- Launch The Sims 4 and hit on “Options.”
- From the menu, click on “Game options.”
- Now, from the available options, select “Other” and tick the option “Enable Custom Content and Mods” and “Script Mods Allowed,” and don’t forget to save changes by clicking on “Apply Changes.”
- Lastly, restart the game, and all changes will be incorporated.

Related
The Sims 4: 13 Must-Have User Interface Mods
To change up or streamline the user interface in The Sims 4, check out these mods from the community.
Must Have Sims 4 Mods

This table showcases the Best Sims 4 Mods:
|
Mod Name |
Role |
|---|---|
|
Have Some Personality Please |
Enhances Sims’ autonomy and interactions |
|
MC Command Center |
Grants total control over all Sims in the neighborhood |
|
Meaningful Stories |
Combination of the Emotional Enertia and the True Happiness Mod |
|
Life’s Drama |
Adds a bit of drama and controversy in the Sims’ neighborhood |
|
UI Cheats Extension |
Simplifies cheat activation in The Sims 4 |

- Released
-
September 2, 2014
- Publisher(s)
-
Electronic Arts
- ESRB
-
T for Teen: Crude Humor, Sexual Themes, Violence
- Engine
-
Proprietary Engine
- OpenCritic Rating
-
Fair